Aunt Lola's DIY Blog

a journal of crafts and DIY projects

Friday, February 17, 2012

Basement Closet: Before

Here are some before pictures on the other project Handyman Thomas is working on. I have no idea what happened here. This drywall was missing when I bought the house. My guess is that maybe there was mold. It does happen to be a spot where water can pool if nobody's paying attention. I'm kicking myself for not having done these projects with everything else when I first moved in. It's such a mess!


Labels:

Stairway Facelift

I have a couple of weeks off in between jobs, so I decided to take some time to do some facelifts in the house. My house project budget is pretty well shot since I spent $9,000 putting a new roof on and re-grading along the side of the house that kept flooding last year. But I was tired of the ugly route all of my guests were taking from the main floor to the basement guest bedroom. So I hired a handyman to come put up drywall on the closet near the guest room entrance and to patch the drywall behind the paneling in the stairway that I planned to tear down.

I started tearing down the paneling on Tuesday. I realized after a few chunks were down that I was dealing with plaster walls, not drywall. And it was very crumbly stuff. Here are some of the before pictures.


And here are some mid-way pictures. All of the paneling is now down. You can see the big pockmarks everywhere there had been a finishing nail. It was such a mess. Handyman Thomas and I decided it didn't make a lot of sense to patch all these crumbly holes, so he decided to cover the whole deal with sheetrock.


In theory, covering the whole deal with sheetrock seemed like a good idea. The plaster was so crumbly, I didn't want to have to worry every time I walked through there that I might knock a chunk out. But when Handyman Thomas started hanging the sheetrock, he had a heck of a time finding studs to attach it to. Apparently the plaster was so thick his studfinder was rendered useless. So he decided to supplement his "wing and a prayer' drywall screws with "liquid nails" glue.


Things are looking okay so far, but I'm totally having nightmares that the plaster is going to crumble under the weight of the sheetrock that's basically held up by glue, and that the entire thing is going to collapse. Here's hoping it holds at least as long as we live here!

Labels:

Monday, February 06, 2012

Adrian's Argyle Sweater Vest Modeled

Here's the final product on Nephew Sweater Vest #2. I used the same pattern for Adrian as I did for Declan, Jane Tanner's Diamond Back Argyle Sweater Vest. This time I used the specifications for the size 2 width again and the size six length, like I did for Declan, but I added even more length. I went for 9.5 inches until I started to shape armholes, and for 16 inches before I bound off. I used the same Plymouth Encore yarn, but substituted a green for one of the blues.


Why is this thing so hot?


Adrian and his big brother Reagan got dressed up in their sweater vest best for some music education at Orchestra Hall!


Labels: ,

Nephew Vest #2

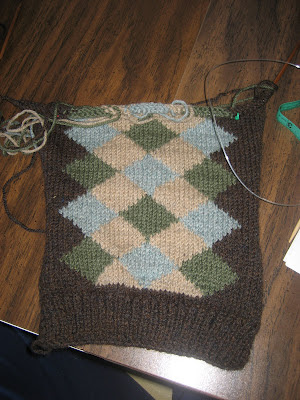
I finally got started on the second argyle sweater vest for the other two-year old nephew. Then I got on a roll and knitted and knitted and knitted, while at the same time spending a weekend watching all of season one of Downton Abbey, my new favorite show. One Sunday night, I looked down and realized I had gone several inches past the point where I should have stopped and decreased for the arm and neck holes.

(insert choice swear words here)

The god of knitting has taught me nothing if not patience and humility. I knew the only answer was to learn some good backing-up technique (known in knitting circles as "frogging," because you "rip it, rip it"). I do this all the time when I get to the end of a row and realize I've messed something up. But I've never frogged on this scale before. I've never torn out inches of work before.


To make things worse, I had already worked in all the ends from all those colorful diamonds. I learned the first time I did this vest that you can save yourself a lot of crazy mess anxiety with all those strands hanging off the back if you stop periodically and work them in. This does not come in handy when you have to rip it out. Not only is it more work I did for naught, but it made the ripping out process all knotty. Not fun.

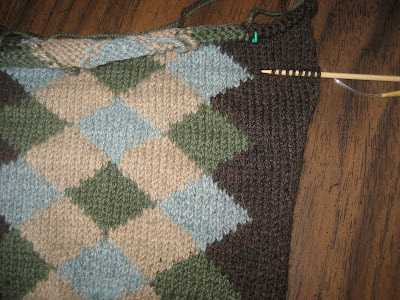
But I did it anyway. I got really good visual instructions from knitty.com. Basically you pick a row you want to go back to, and then insert a needle into the right leg of every knit stitch all the way across your piece. Then you just start pulling out everything above it.


Labels: , ,

Sunday, February 05, 2012

Heather's Gap-tastic Cowl

My friend Heather commissioned this piece. I pulled a bunch of cowl patterns from Ravelry for her, and she chose Jen Geigley's Gap-tastic Cowl. It was a really easy, quick knit. 131 stitches cast onto size 13 circular needles, then seed stitched for 15 inches.


Heather chose the luxurious Lion Brand Wool-Ease Thick & Quick in Citron.


Labels: